Here we'll show you how to manually assign DNS (Domain Name Service) servers for your Internet connection using Windows Vista.
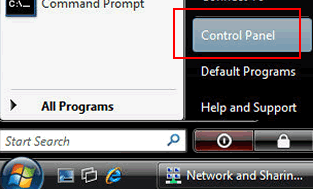
- Go to the Start Menu and click Control Panel
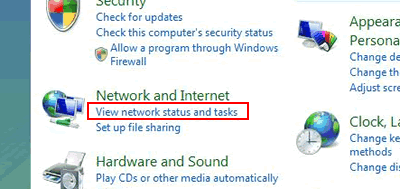
- In the Control Panel, under Network and Internet, click View network status and tasks.
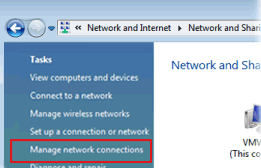
- Click the link next to Connections on the right. In this screenshot we're using a wired connection so the link is called Local Area Connection. If you're using Wireless the link will be named differently.
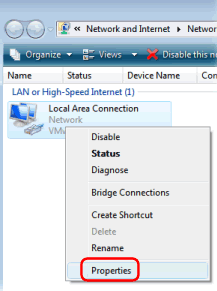
- You'll see a connection status window, click Properties.
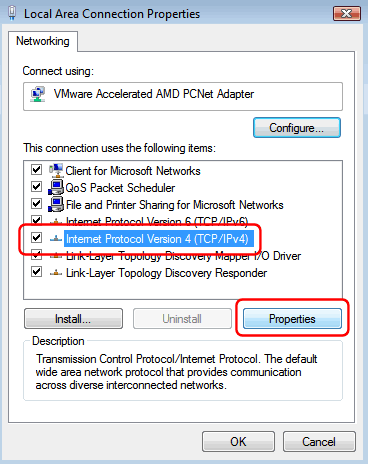
- Select the Internet Protocol Version 4 (TCP/IPv4) item, and click the Properties button.
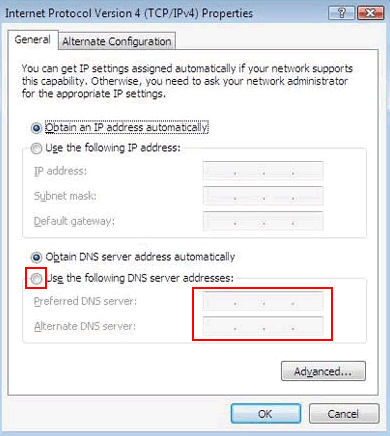
- Select Use the following DNS server addresses, and enter:
- Preferred DNS server: 212.159.13.49
- Alternate DNS server: 212.159.13.50
- Finally click the OK in this and the previous windows to save your changes.
No comments:
Post a Comment